
diff options
Diffstat (limited to 'tutorials/module_1/intro_to_anaconda.md')
| -rw-r--r-- | tutorials/module_1/intro_to_anaconda.md | 15 |
1 files changed, 7 insertions, 8 deletions
diff --git a/tutorials/module_1/intro_to_anaconda.md b/tutorials/module_1/intro_to_anaconda.md index cbd9dd2..05fe686 100644 --- a/tutorials/module_1/intro_to_anaconda.md +++ b/tutorials/module_1/intro_to_anaconda.md @@ -3,15 +3,14 @@ Anaconda Navigator is a program that we will be using in this course to manage Python environments, libraries and launch programs to help us write our python code. The Anaconda website nicely describes *Navigator* as: -<blockquote> - <p> a graphical user interface (GUI) that enables you to work with packages and environments without needing to type conda commands in a terminal window.Find the packages you want, install them in an environment, run the packages, and update them – all inside Navigator. -</blockquote> + +*a graphical user interface (GUI) that enables you to work with packages and environments without needing to type conda commands in a terminal window.Find the packages you want, install them in an environment, run the packages, and update them – all inside Navigator.* + To better understand how Navigator works and interacts with the anaconda ecosystem see the figure below.  As you schematic indicated, Navigator is a tool in the Anaconda toolbox that allows the user to select and configure python environments and libraries. Let's see how we can do this. - ## Getting Started Note to windows 10 users: Some installation instances do not allow users to search the start menu for *Navigator*, instead, you'll have to find the program under the *Anaconda (anaconda3)* folder. Expand the folder and click on *Anaconda Navigator* to launch the program. @@ -29,11 +28,11 @@ Although the base environment comes with many libraries and programs pre-install 1. Click on the *Environments* page located on the left hand side. -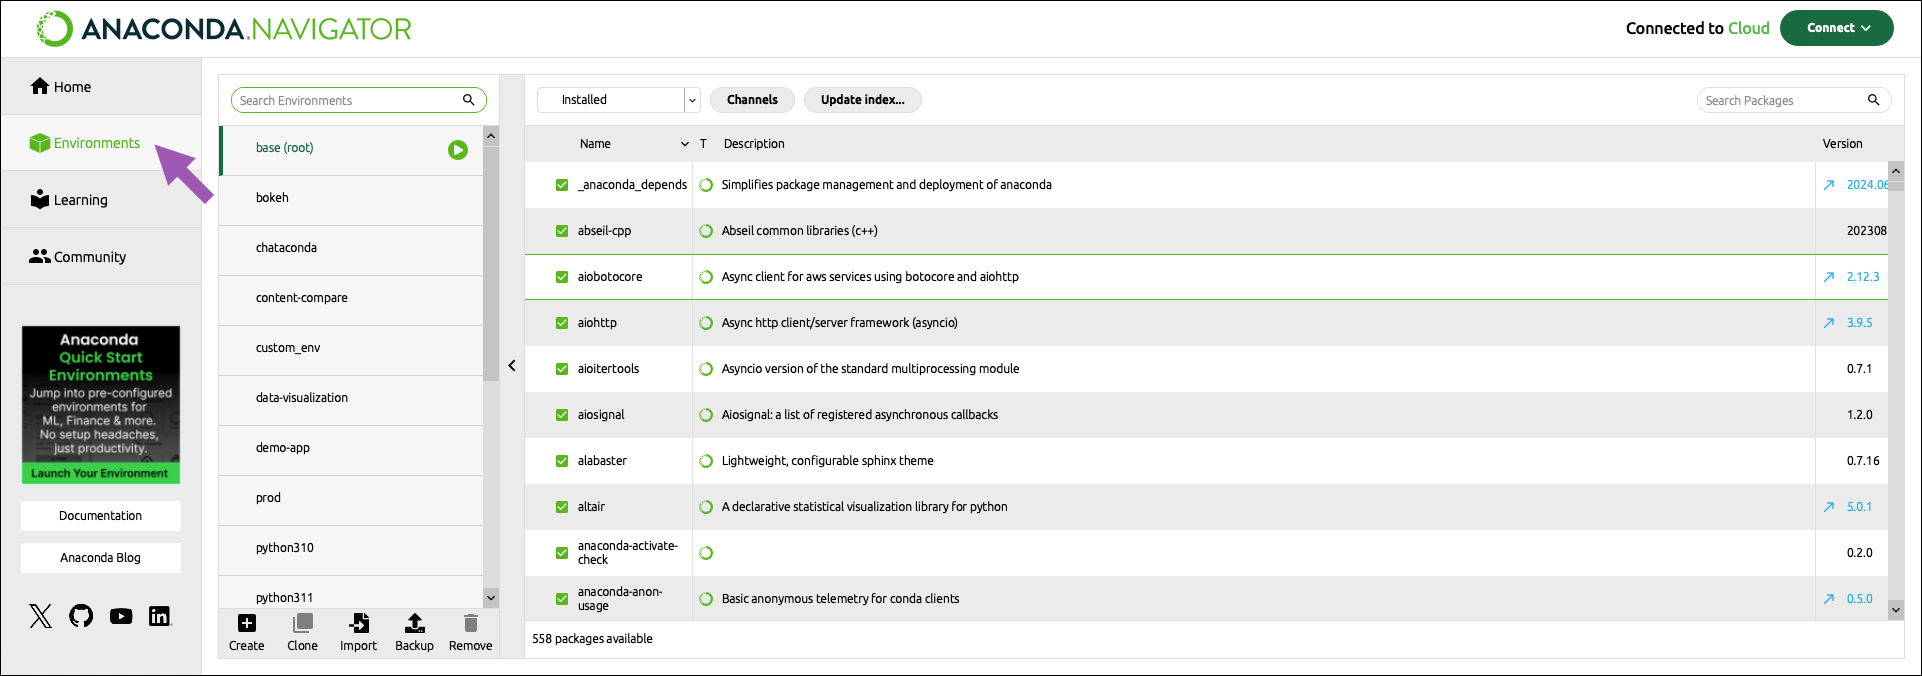 + 2. At the bottom of the environments list, click *Create*. - + 3. Select the python checkbox. @@ -50,7 +49,7 @@ Now that we have a clean environment configured, let us install some library we 1. Navigate to the environment page and select the environment we just created in the previous section. - + 2. Use the search bar in the top right corner to search for the following packages: @@ -74,6 +73,6 @@ From the *Home* page you can install applications, to the current environment we 3. From the Home page find the Spyder IDE tile. Click the *Install* button to start the download. - + 4. Once the download is complete, press *Launch* to start the applications.
\ No newline at end of file |