
diff options
| author | Christian Kolset <christian.kolset@gmail.com> | 2025-03-26 11:15:23 -0600 |
|---|---|---|
| committer | Christian Kolset <christian.kolset@gmail.com> | 2025-03-26 11:15:23 -0600 |
| commit | 342f81028b35d21d04848e0de2b52d781c5cfbd4 (patch) | |
| tree | 41eb2dc806f5301853ce7c039151c12c4cd72b39 /tutorials/module_1 | |
| parent | 49758f4f4d41c2061bf71a64598f726916bc2105 (diff) | |
Updated links to remote images in intro_to_anaconda.md
Diffstat (limited to 'tutorials/module_1')
| -rw-r--r-- | tutorials/module_1/1_03_intro_to_anaconda.md | 14 |
1 files changed, 7 insertions, 7 deletions
diff --git a/tutorials/module_1/1_03_intro_to_anaconda.md b/tutorials/module_1/1_03_intro_to_anaconda.md index 543239e..84c6516 100644 --- a/tutorials/module_1/1_03_intro_to_anaconda.md +++ b/tutorials/module_1/1_03_intro_to_anaconda.md @@ -23,23 +23,23 @@ Once Navigator starts, under *Home*, you'll see tiles of programs that come with The *Environment* page allows us to install a variety of libraries and configure our environments for different project, more on this in the next section. ## Environments -A Python environment can be thought of as a "container" where you can have all the tools, libraries, and dependencies your Python project needs without interfering with other projects. Think of it as a toolbox dedicated to a specific task. +A Python environment can be thought of as a "container" where you can have all the tools, libraries, and dependencies your Python project needs without interfering with other projects. Think of it as a dedicated toolbox for your project. Although the base environment comes with many libraries and programs pre-installed, it's recommended to create a dedicated environment for your projects. This protects the base environment from breaking due to complex dependency conflicts. Let us go ahead and create a new environment for us to use Spyder with. 1. Click on the *Environments* page located on the left hand side. -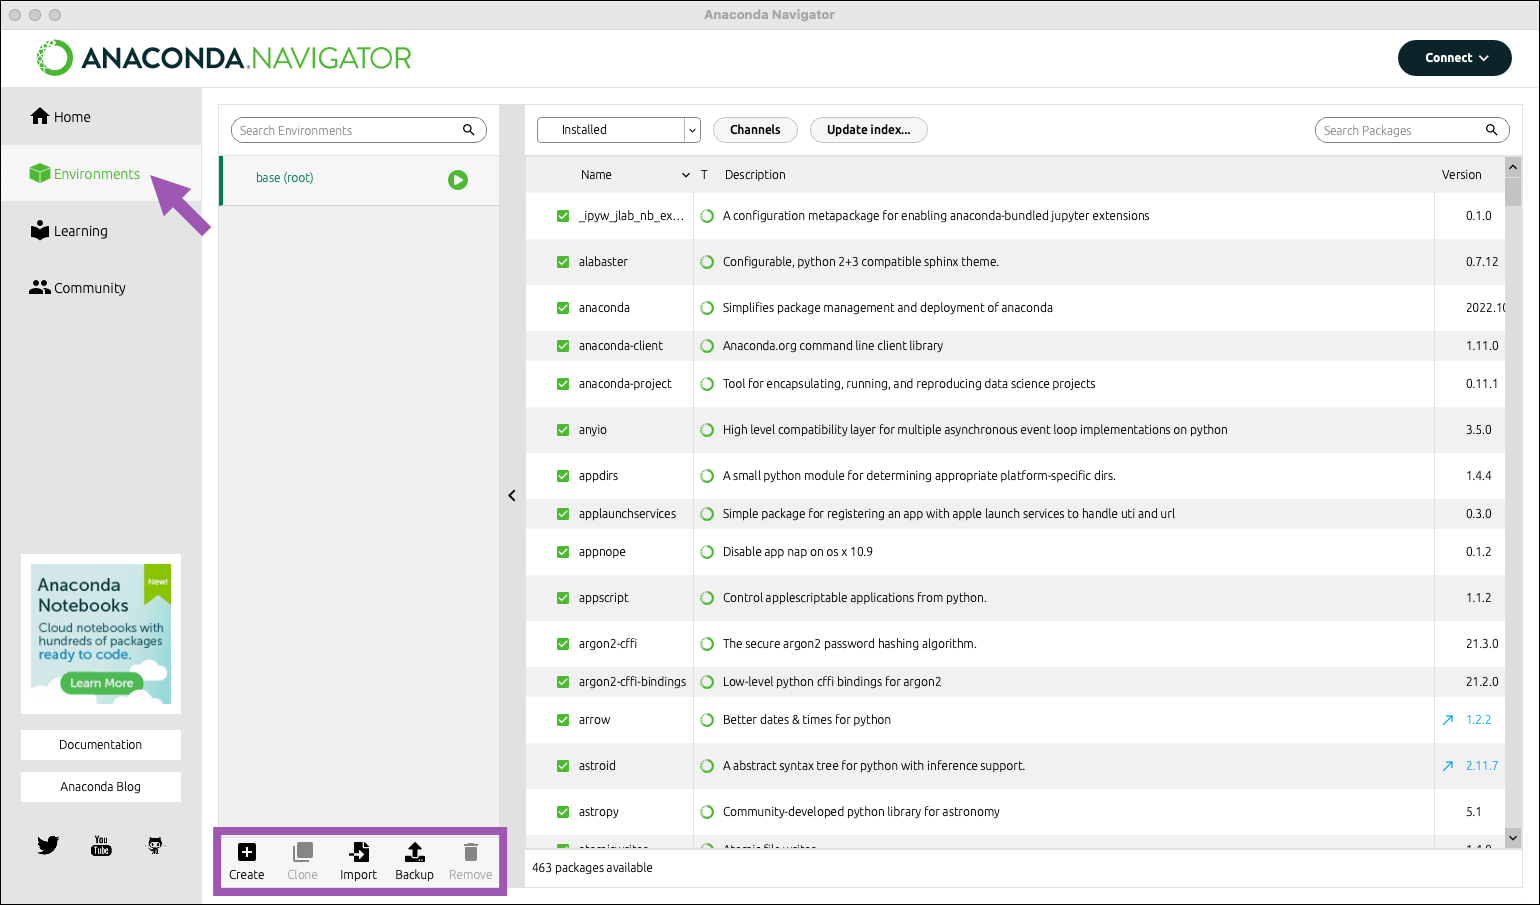 +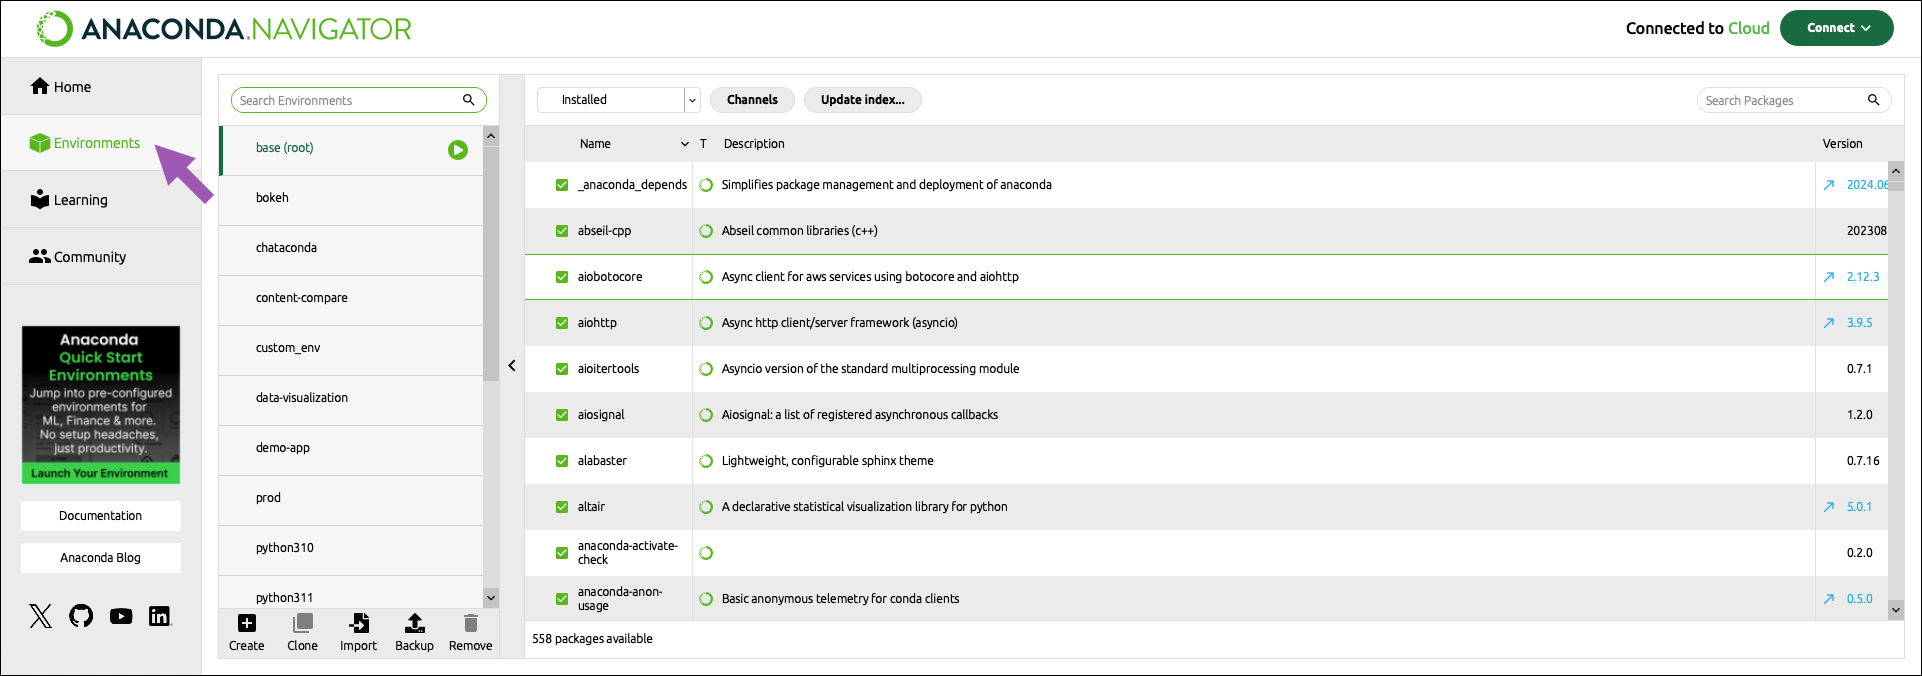 2. At the bottom of the environments list, click *Create*. -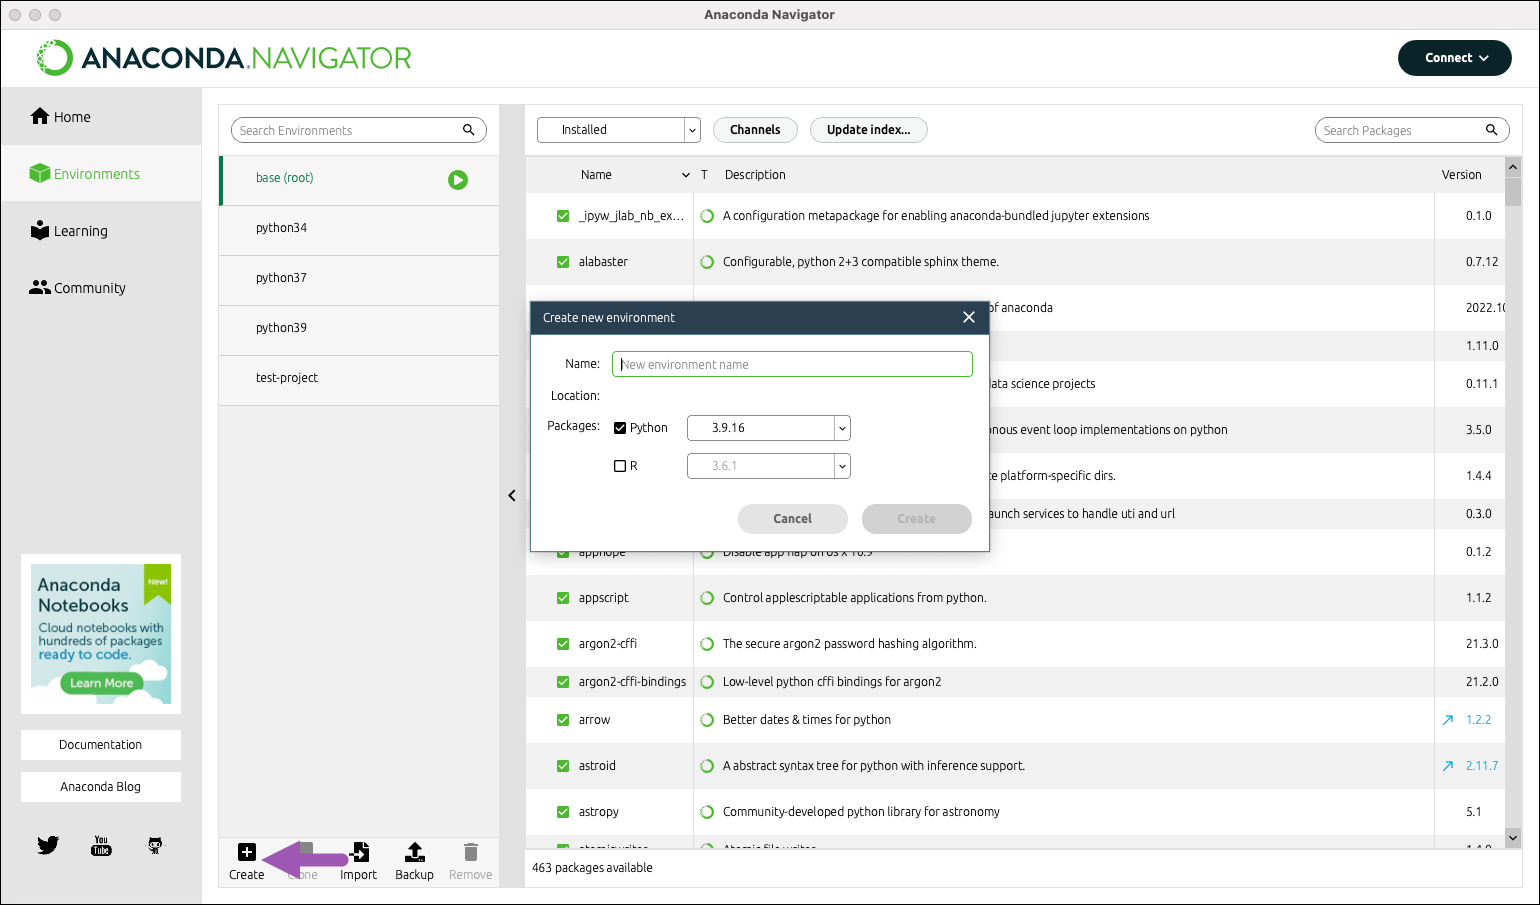 + 3. Select the python checkbox. 4. Select versions of python. At the time of making this tutorial the latest version of Python is 3.xx.x. We will go ahead and use that one. -5. Choose an appropriate name for your project. We will be creating an environment for the Spyder IDE so we'll call it "spyder-dev". +5. Choose an appropriate name for your project. We will be creating an environment for the Spyder IDE so we'll call it "Spyder-env". 6. Click *Create*. @@ -50,7 +50,7 @@ Now that we have a clean environment configured, let us install some library we 1. Navigate to the environment page and select the environment we just created in the previous section. -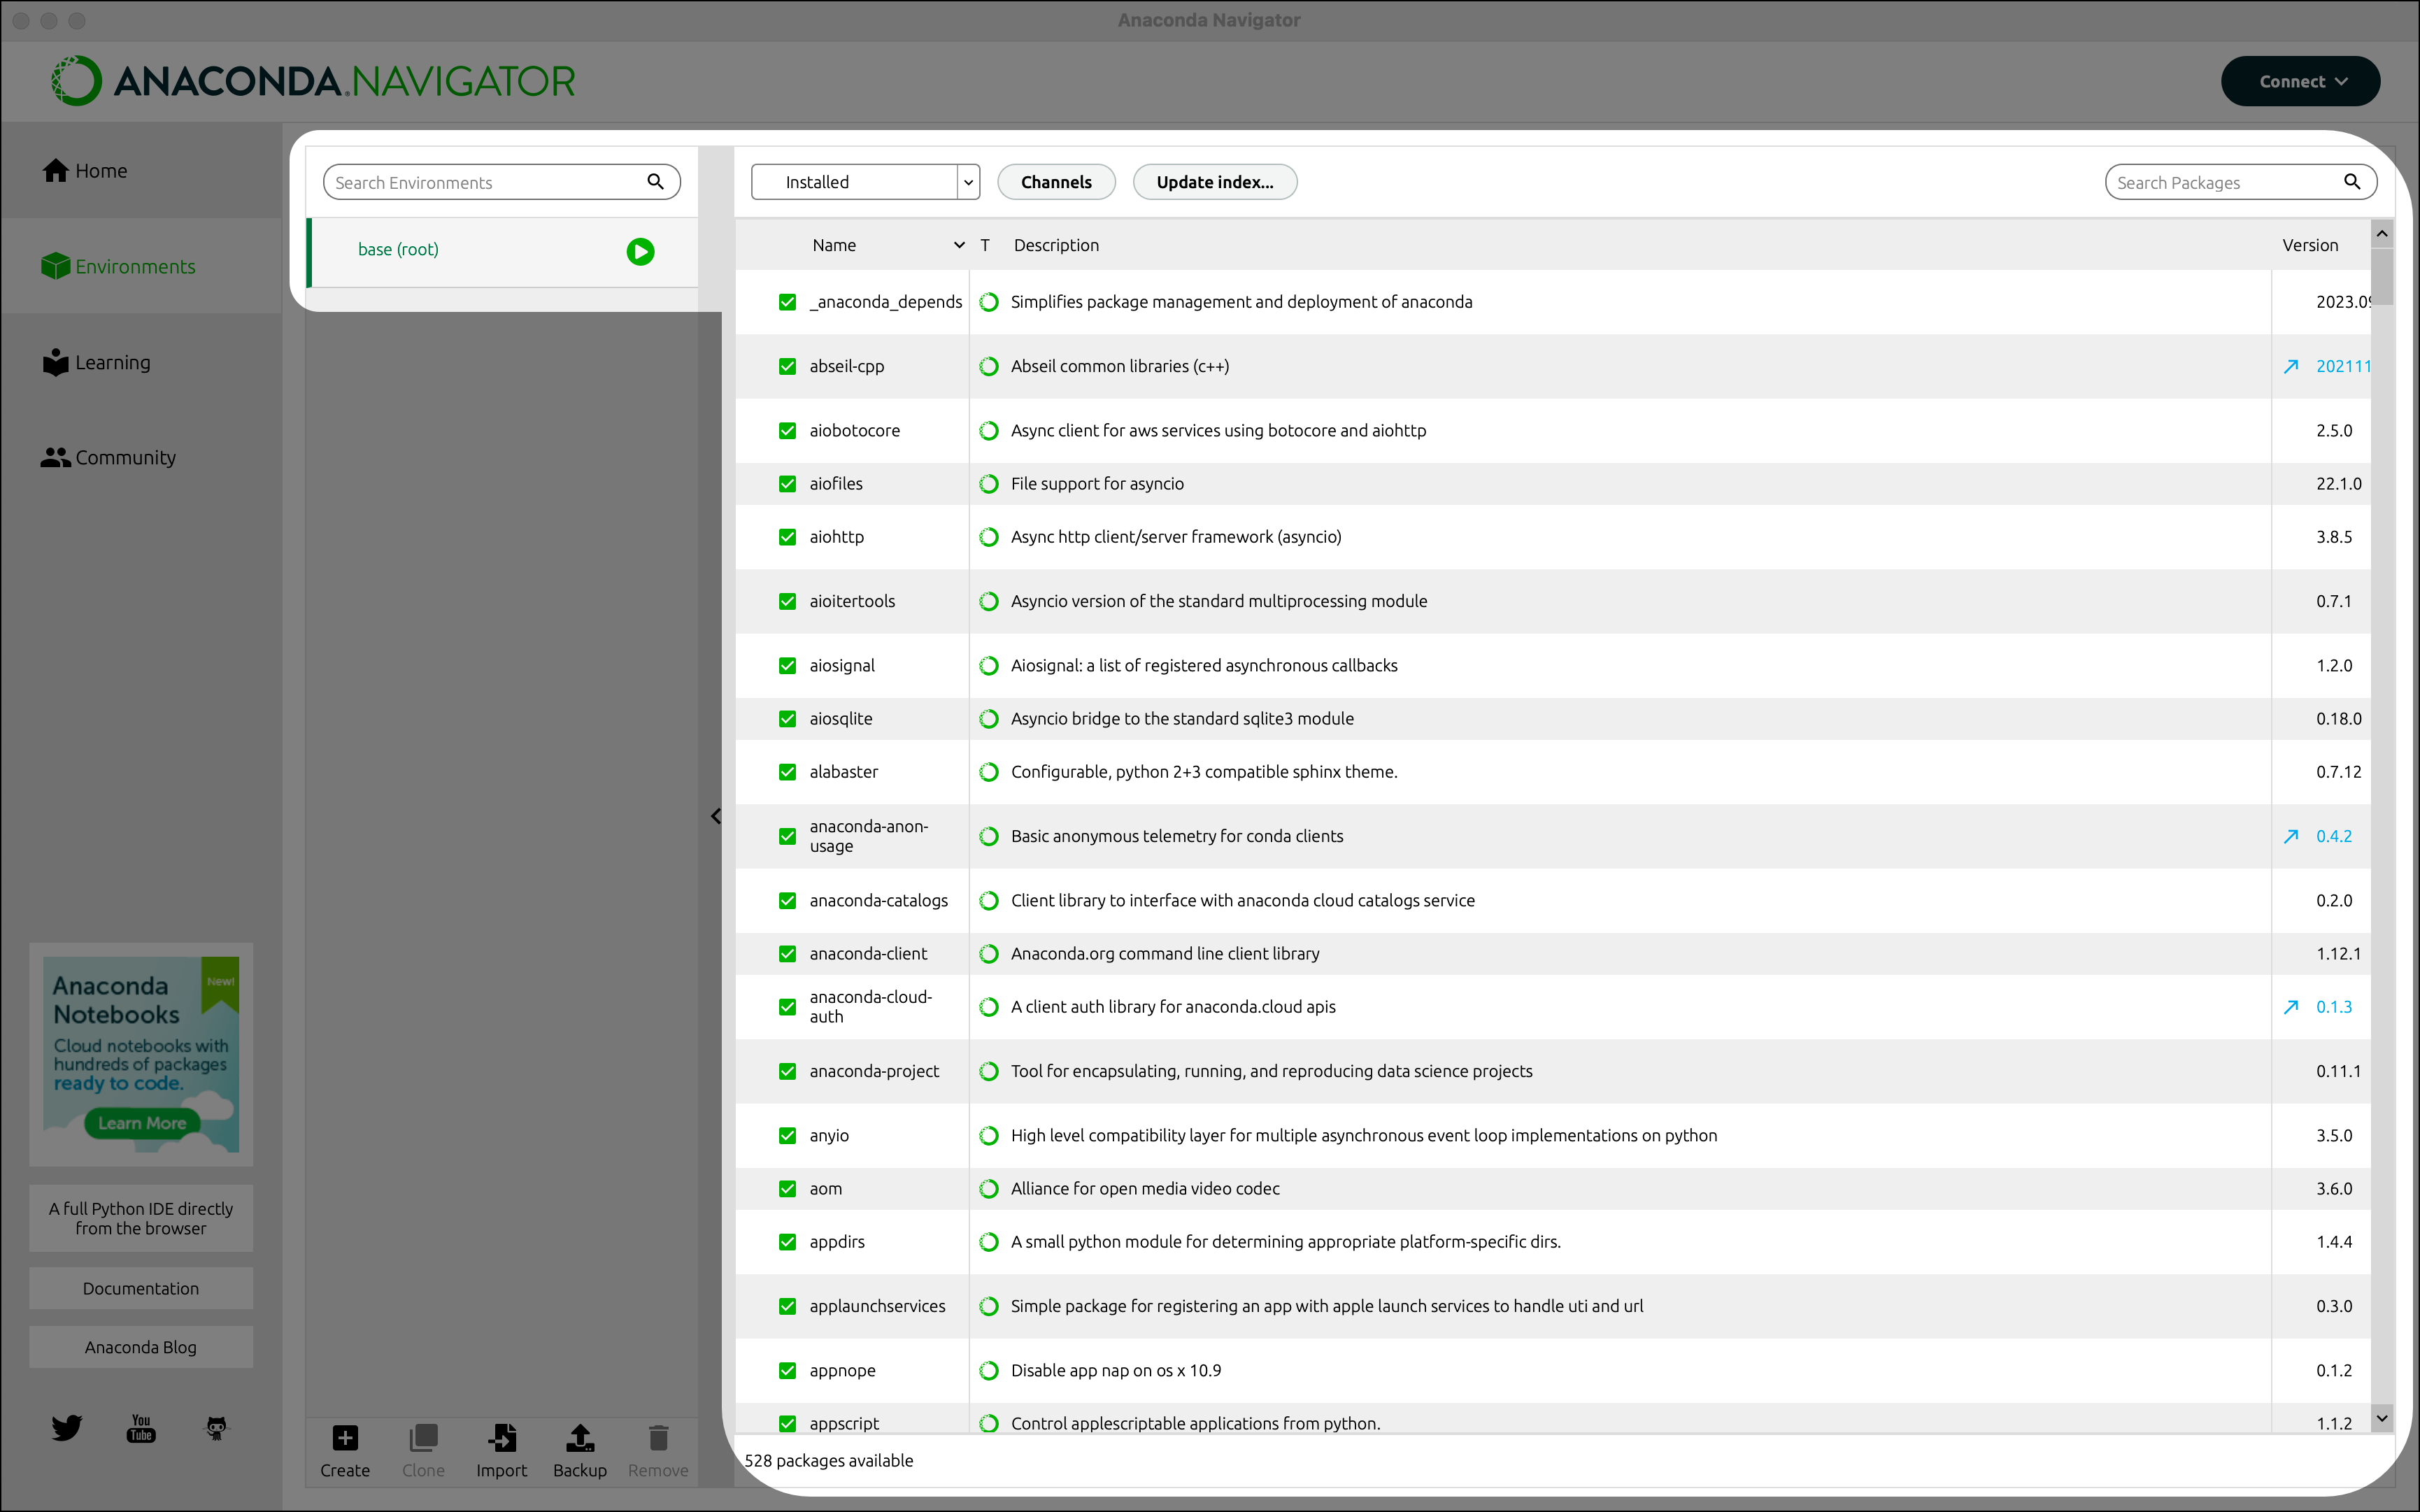 + 2. Use the search bar in the top right corner to search for the following packages: @@ -70,10 +70,10 @@ From the *Home* page you can install applications, to the current environment we 1. Go to the *Home* page. -2. Select the desired environment. In our case, we select Spyder-dev. +2. Select the desired environment. In our case, we select *Spyder-env*. 3. From the Home page find the Spyder IDE tile. Click the *Install* button to start the download. -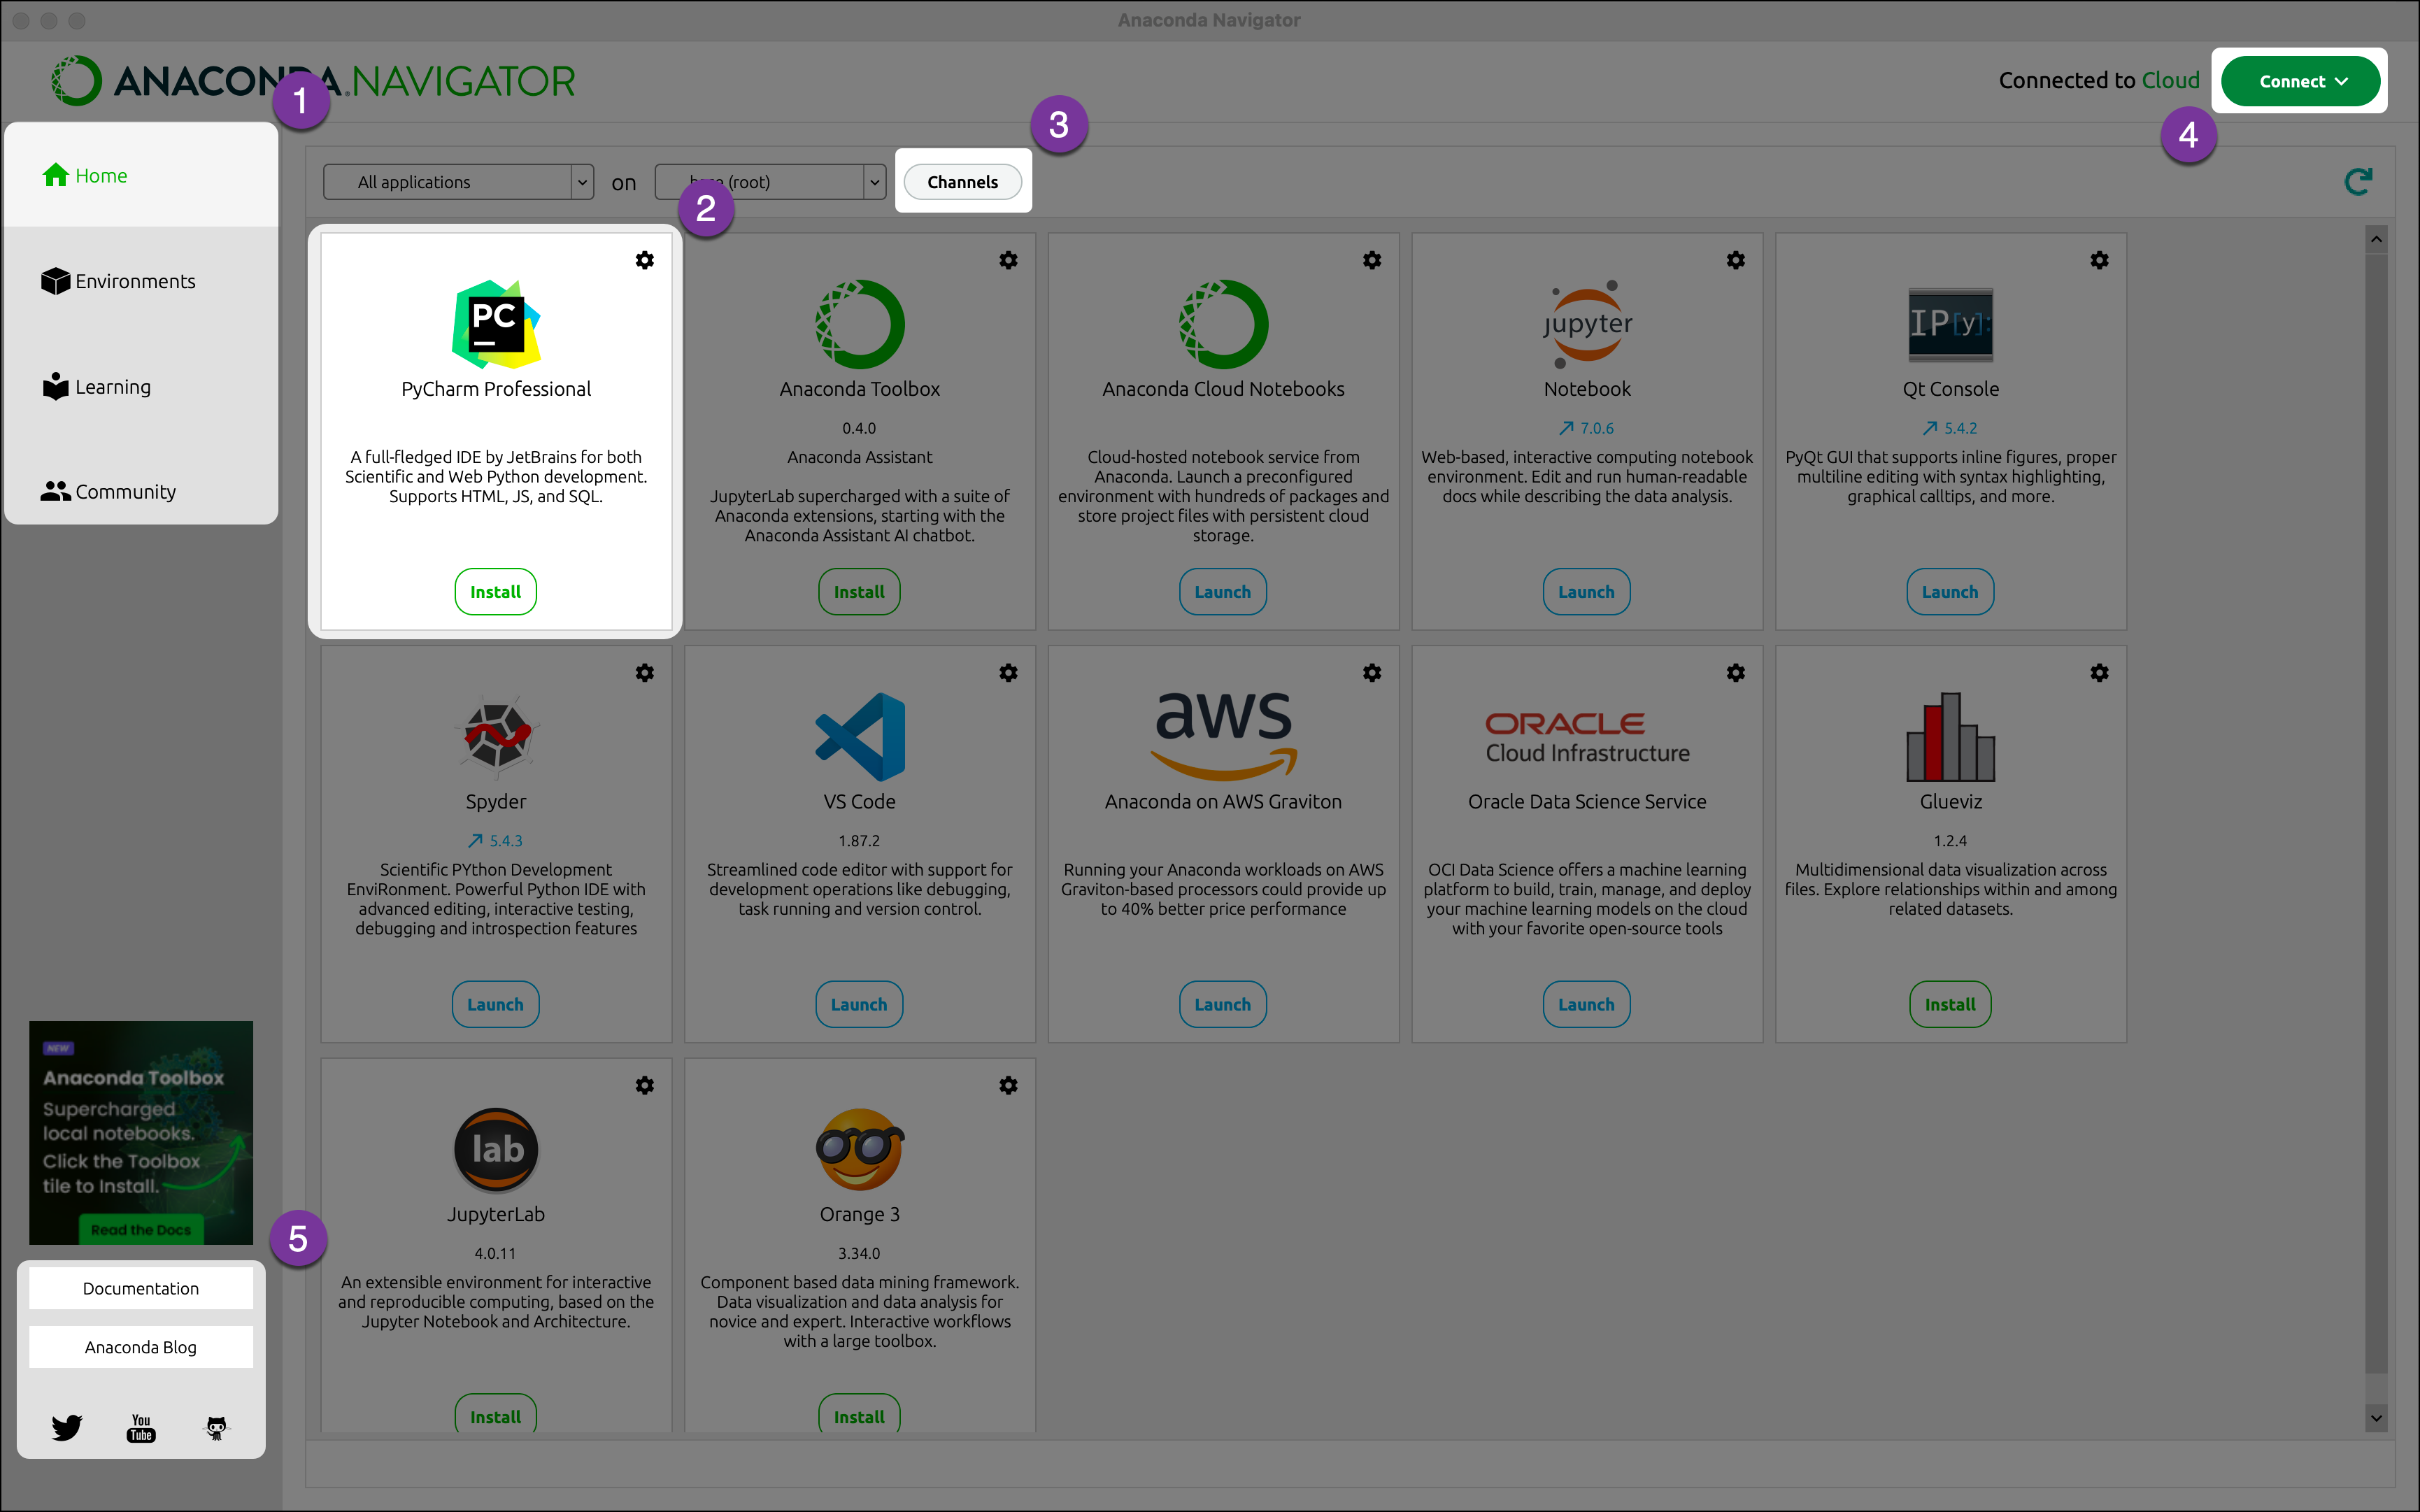 + 4. Once the download is complete, press *Launch* to start the applications.
\ No newline at end of file |